Create Space in the Classroom


Go to CreateSpace.com
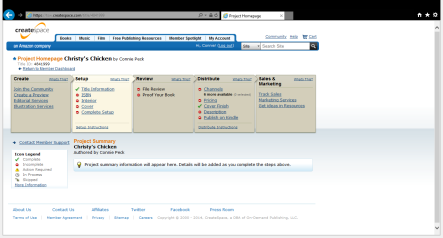
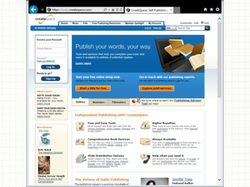
Here’s the CreateSpace portal. Click signup and enter first and last name, email address (which will be your login ID), and your password. Select your country and the type of media you will be producing with this account. Then click ‘Create My Account’ And you're in - ready to start
See photos above to illustrate these steps. I hope it isn't too complicated. Trust me, the program will not let you mess up.
Looking at an unfinished project of mine we see that the entire process is completely guided, and I’m here to tell you; it’s pretty difficult to do something wrong, either the program will not advance, or it will send you a message highlighting your error.
The first box has some good resources, like the community, or forum, where you will see discussions on a hundred and one topics. You pay for the editorial services and illustration services, but that’s what the classroom is for in your case. The preview tab is on this page as well.
Setup is the meat of this page. Title first, it won’t let you move forward without one.
This is the ‘Title Information Page’. And now you see the steps you need to complete on the left side of the screen. Fill in the blanks. Only the red starred items are required. Leave the publication date blank until the last couple days, the program actually fills in that date when you approve the final copy. Save and Continue (button on bottom). You can see that I’ve made an error in the title box. I’m able to come back to this page and make changes as I need. Big Tip – You can complete each step from here, or you can skip steps and come back, this step gives your book a slot and a title id number. I love to work on my cover throughout the process, and I only buy my ISBN when I have the cash in the bank.
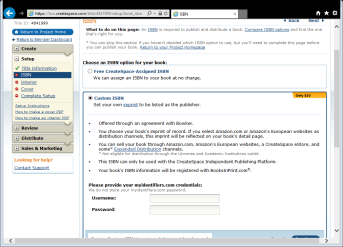
The ISBN is the bar-code on the back of all books. You can opt for a free, CreateSpace ISBN, or you can select a custom number for your own publisher’s name (fun for the classroom to create, and you can have a different name for different classes or groups) For the custom option you will have to log onto ‘myidentifiers.com’ and create an account with them, then hop back over to CreateSpace and log on from here. The ISBN’s on MyIdentifiers have outrageous prices, but through CreateSpace, you can get one for $10.00. Remember, you can do this at any time during the process, but you cannot submit files until this step has been completed.
NOTE: AS OF 2015, THIS PROCESS IS MUCH EASIER, SOME OF THESE INSTRUCTIONS ARE NO LONGER NEEDED
Click on ‘Register’, top right. Write down your login information, but don’t buy your ISBN’s here. Go back to CreateSpace.
I think, you can own several ‘imprints’ that is different names for different publishing companies (groups or classes) however, each one may have to be on it’s own account. My publishing ‘company’ is Mrs. Piddles Publishing, however. I own a business license and have a tax number for exemptions. This is a topic to take up with your principal or superintendent, or librarian.
By the way, if you do plan to sell books and you have a tax number, send this to CreateSpace to get your books tax free - remember you also have to file sales taxes with your state.
Fun part begins! Of course by now, the class has created their stories.
*You may decide on an anthology of short stories for the whole class, or a novel which the whole class, or a group has written – and/or – illustrated. **You may choose a full color format, for picture books, or black and white. If you choose b/w you will also choose the paper color. Bright white is easier on eyes in lower light, cream is selected for bright light reading (like beach reading) **Then you will choose your trim size – the size of the book. There are plenty to choose from. Download the template! **Again, download the template of the book size you choose. It literally takes an expert weeks to format a book, this one is done for you. One of the easy points.
*Save the template on your computer, and add the content. This is a whole different lesson! But you can get tips from the community. Each page has been formatted from the title page, to the copyright page, and the dedication and acknowledgements. Study books from the library for ideas. One thing I often forget until I receive my first proof is copy/pasting my ISBN numbers onto the copyright page. Each chapter is a separate section, but the chapter page numbers will not automatically fill in the Table of Contents. Don’t forget the headers for the title and author name. You cannot put in individual chapters in the headers. You can change fonts to suit your fancy, and you can copy/paste additional chapters, or delete the ones you don’t need. I usually need more chapters, so I will highlight and copy an entire chapter down to the section break, and paste it between chapters. The page offsets will flow correctly automatically. Big Tip – The template comes with several pages of nonsense words to fill pages. I delete all but a couple lines of each chapter for easier pasting of my content.
*When you have your template filled with your content, come back to this page and upload that file. Easy Peasy. Then wait for directions. It can take a few minutes for the first step, sometimes longer, then up to 24 hours for the second step. Now we work on the Cover.
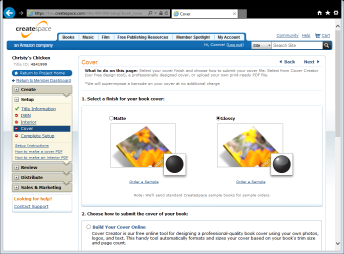
As I said, you can work on the cover any time during the process. In the first screen you choose either Matte finish or Glossy. Matte is a lovely, velvety finish which looks sophisticated. Then you choose, ‘Build Your Cover Online’, and Launch Cover Creator, a big blue button on the pop up box when you select Build your own. There’s also a button for uploading a pre-formatted cover PFD, but they have a template for that as well. I’ve tried it using PhotoShop. That’s an advanced class!
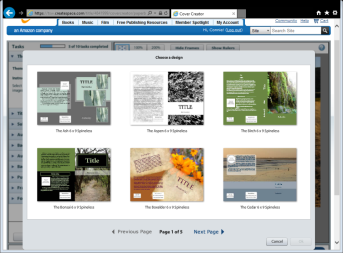
Once cover creator is loaded, you have a wide selection of templates to choose from. These are just styles, you can make many changes, and you can change a style even after you’ve done the work and you simply don’t like what you see. This is a fabulous exercise. I’ve painted my own cover, and hired one of my readers to paint another. My first cover was done by a professional and I’m not even able to correct a spelling error because she used a PFD. If I want to change the cover of that book, I start a new project, get a new ISBN and on the title page, I have to list the new book as the second edition.
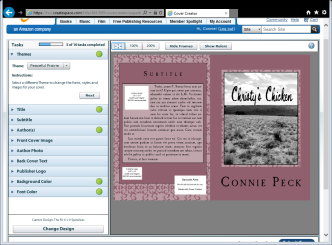
This is just one of the choices, browsing can be fun, cooperative learning, or voting for a favorite, or a competition. I think there are cover competitions on GoodReads. The view you will work with is spineless, the program will create the spine to fit your book.
In the project box you can zoom in or out, show rulers, etc. On the left menu, again you see that every step is carefully laid out. You will not be able to submit your cover until all those lines have a green dot. Some of the fields can be made invisible, such as the author photograph, or the logo, also the subtitle. **The top line allows you to select a theme, this refers to the style of the font, many choices. **Next you have the title and subtitle. I learned the hard way, make absolutely sure the title of the cover matches the title of the interior, it won’t pass inspection and will set you back a couple of days with your production schedule. **Subtitle can be made visible or invisible with a check in the box. **You may list a few Authors, but each name makes the words smaller. **Cover image can come from one of their stock photos, or you can upload your own. The program will tell you what size, but if your picture is too large, you have a bit of wiggle room to move it around. *Different templates require different sized pictures. **You can upload one author photo or delete the field. **The back cover text is for the book summary, short sweet, catchy, but don’t put the ending in! **Some templates have a separate field for ‘About the Author’. **A logo can be another great project, or it can be deleted. **Background color can be changed, a zillion choices. **The Font color can be changed to complement the style and the background color or the cover art. **The box for the ISBN will be filled in by the program. **When your project is complete (even before your interior is complete), you submit it for review. If you make changes to your interior, you will have to resubmit the cover, but the program will advise you. (I sometimes submit a dummy interior to get a cover preview to copy into my webpage before the interior is finished, it’s also great practice)
It is possible to close this screen before you complete the work, it saves automatically, but you won’t be able to submit it until all the tasks are complete. This is one of my favorite projects.
Moving on to ‘Complete Setup’. If you have already uploaded your interior and it has been approved by the program (they only check the parameters and will tell you if any of your illustrations need work) and you have submitted your cover, you will be able to move on through this phase. Here you will review what you’ve done so far and click the blue button at the bottom which should say “Submit Files”. As you can see, the program will not allow you to go past certain areas without completing the tasks. This project still needs the ISBN and the interior, and of course the cover is not complete.
You will receive a message that the files are under review and you will be notified within 24 hours if the project is ready for proofing.
This is a completed project, to show what the “Complete Setup” looks like after files have been approved. From here you will go to ‘File Review” Of course I cannot show the file review page on anything because it’s already done or it’s not ready. Humph. Come back to this later
Your Previews
Writing a book and publishing on CreateSpace offers a wide variety of writing techniques, from the actual story, to many types of summaries. Sometimes a summary will contain the resolution of the plot, more often not. Sometimes you are limited to a Tweet sized summary (called a log-line), sometimes you have 100 words, 250, or 500, depending on the summary requirements. Students have the opportunity to learn how to summarize with a punch (translates to awesome resumes). All these are great writing exercises which you often have great difficulty teaching – unless there is a reason!
Previews like this can be used to generate interest in the story before it reaches publication.
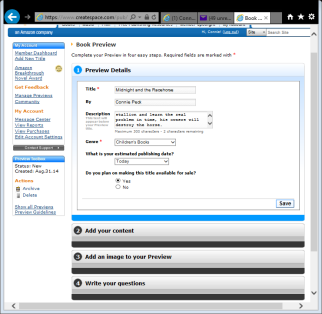
Click on ‘Manage Previews’ then ‘Create New’ to open this page. Four steps 1-Details, here you have a description of only 300 characters, make sure it rings! Click save to open the next section. 2-Add your content, here you have 25,000 characters (that’s not words). You can upload an already written file, or type directly into the box. Another great exercise and a lesson in word count and finding character information. Save and continue. 3-Upload an image, usually the cover which has been generated in Cover Creator – even before the book reaches completion. 4-This section is more fun. Students can generate a couple of questions based on the writing sample entered in section 2 and when readers look at the preview they can rate the preview and answer the questions anonymously.
After all parts are complete you are able to select a link, from the ‘manage previews’ page, to post on a website or news letter so others can rate your review. The opportunities are endless, and of course all of these previews can be deleted and new ones posted.
Here’s my preview of Superstition Gold
I used a few pages from one of my chapters for the content. And my two questions are: Who do you think ‘the others’ could be? And Would you go on an overnight trail ride or hike in mountains which might be haunted?
Be creative!
Your Copyright – this is a discussion to take to your team.
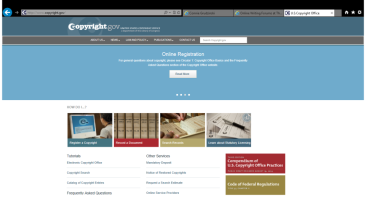
A word about copyright. Here is another website you will need to register and have a login and password to remember. To get started in this step, click ‘Register a Copyright’, the first box.
I have one open project, I made errors and had to resubmit. And I had to call for support. Phone number is (202) 702-3002 for tech support, but everyone is super helpful. If you need assistance, contact a Registration Specialist. If they send you an email, respond by returning that same email, don’t erase the original message, and it’s even better to contact the person who sent the message, by phone, no kidding. Next I will attempt to register my new book, Superstition Gold.
Start the process, if you have more than one contributor, such as an illustrator or more than one author, select no for that second box.
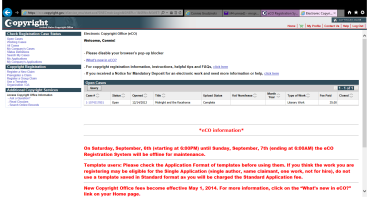
Again you see a list of required steps on the left side of the screen.
First screen asks you to select the type of work from the list in the middle. We’re doing a literary work, so you select that from the pop-up in lower right corner.
Here I will select ‘New*’
And be directed through a series of screens where I enter Title information. Each screen is important and not filling in the fields correctly will stall the process, but you can always call their help line. The people are friendly.
In the previous three screens, not shown, I selected the type of work ‘original work’ and entered the title as it appears on the book.
Then I was directed to a screen to enter the publication date (from CreateSpace) A simple and easy fill in the box page. This page I will select only the contributions I made to the book.
The next page, not shown yet, allows me to enter my own information and since I write under a name different from my legal name, I am able to add this under ‘pseudo name’. Click save and I am directed to a page where I select exactly what I contributed to the book. This is the area where I got messed up with my last book.
Every single person who contributed to this book will be added in this screen, you are directed back to this screen until you click ‘Continue’. Since I have two other contributors (art) I must add their names – and make sure I have written permission to use their names and work on file. (I keep these records indefinitely)
Handout definitions -Now I’m ready to click continue. The work these young ladies contributed was Art and Photographs, based on the definitions. It is appropriate for me to apply for this copyright on their behalf, however if these girls wish to copyright their own work, they must apply separately. When I entered their work, I selected a pop-down menu for type of work and theirs is ‘Work for Hire’. I believe this would be the correct tag for work contributed by your students, and the following page allows you to list their specific contributions. You can select ‘Other’ and add details.
Here is one of the contributors previously listed, in the highlighted box I selected ‘by transfer agreement’
The limitation of claim is the other spot which tripped me up in my last book. I fill in what I did under ‘Material Included’ and I click the boxes of the work others did. Notice I didn’t claim editing or compilation. I simply didn’t mention the editors of my work, since this one went through a workshop – too many people to list. Also I didn’t hire a professional. I can list an editor on their behalf, but again a professional editor will have to file their own copyright for only the editing.
The next three pages are Rights and Permissions, Correspondent, and Mail Certificate. I list all of my personal information, name, address, phone, and email, then continue (pages not shown)
And after that is ‘Special handling’ You won’t select all those other boxes, unless you are working on a deadline, but I doubt this would expedite the process much and it costs more. Do not click anything in this Special Handling page! (Not shown)
Here is the page where you certify you have the right to apply for this copyright. If you wish to add a note, use the box at the bottom.
Nearly finished, the next page is for you to review, you can edit any page, but trust me, if there is a problem, they will contact you, make sure you have used an email you can access any time of the year, they are subject to contacting you months later and if school is out, you may not receive the notification until it’s too late. Then ‘add to cart’ and pay. Here’s where you may need the intervention of the school secretary or librarian – unless they authorize you to handle this account on your own.
You actually have the option of submitting electronic files (Only for E-books which will never have a hard copy) or sending copies, but since you have to send the copy anyway for them to have an actual printed book in the archives, I just print a shipping slip and send the books. You must send two copies of the best version, and you have 30 days from the time of the application to send those. (Come to think of it, I may have to submit an e-copy anyway, they will let me know)
Thank you.
I welcome your comments and questions – [email protected]
